
Your Home Base for Research and Collaboration
Footage.net is a lot of things to a lot of people. Our Zap Email requests have become a critical tool for researchers, journalists, and documentarians across the United States and around the world. Our aggregated search features make finding the best and most germane pieces of footage easier than it has ever been, and have connected archives with the right customers in a way never before possible.
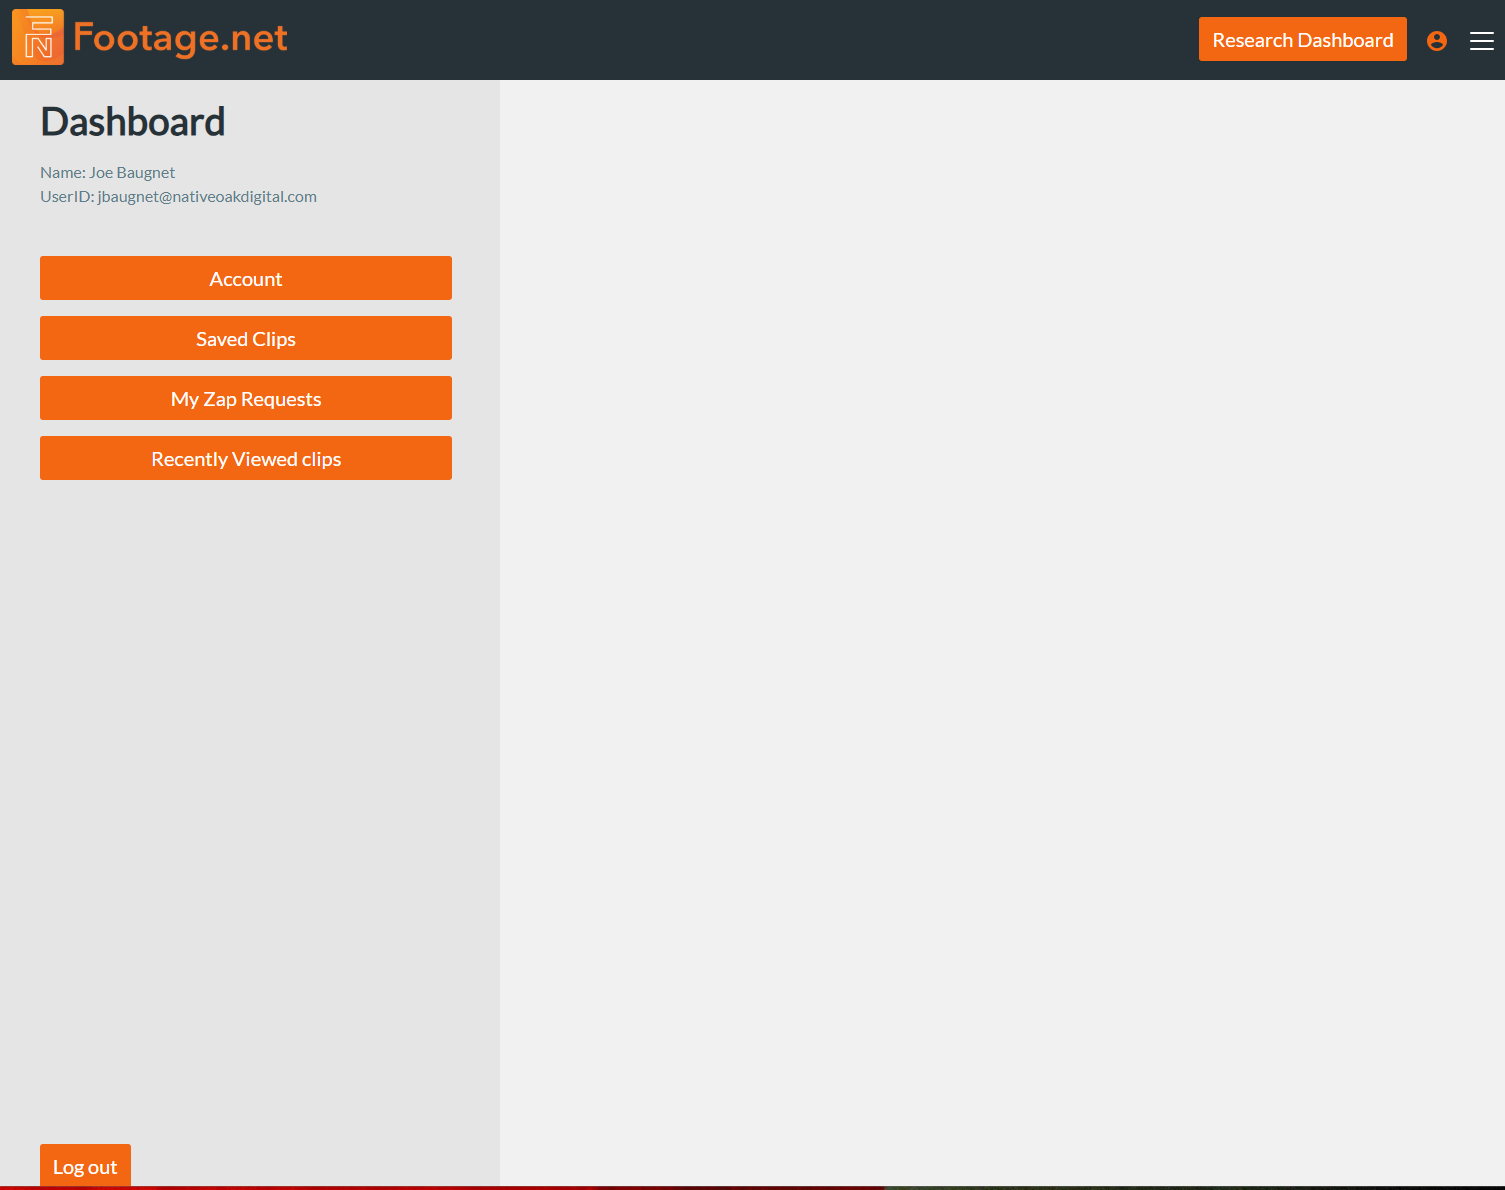
Now, it’s easier than ever to harness that capability through the Footage.net Research Dashboard. Accessible via a dedicated menu bar button from nearly any page of Footage.net, via the primary site menu, or by URL at Footage.net/dashboard. This tutorial will teach you how to use the Research Dashboard to the fullest capacity.
Getting Started: Where to Find the Research Dashboard
You can find the Research Dashboard on Footage.net in three ways. Before you do, you will need a Footage.net account to use it. Create an account here.
- Visit footage.net/dashboard (must have an account to log in)
- Dedicated menu bar button (located on the top of most pages)
- In the primary site menu (My Account > Research Dashboard)
Screenshot placeholder — replace in Elementor editor
How to Use the Research Dashboard
The Research Dashboard is built to be your home base through the entire research and licensing process.
There are endless ways to harness the power of your Research Dashboard. This is our recommendation for getting started.
1. Save and View Clips Across the Entire Footage Ecosystem
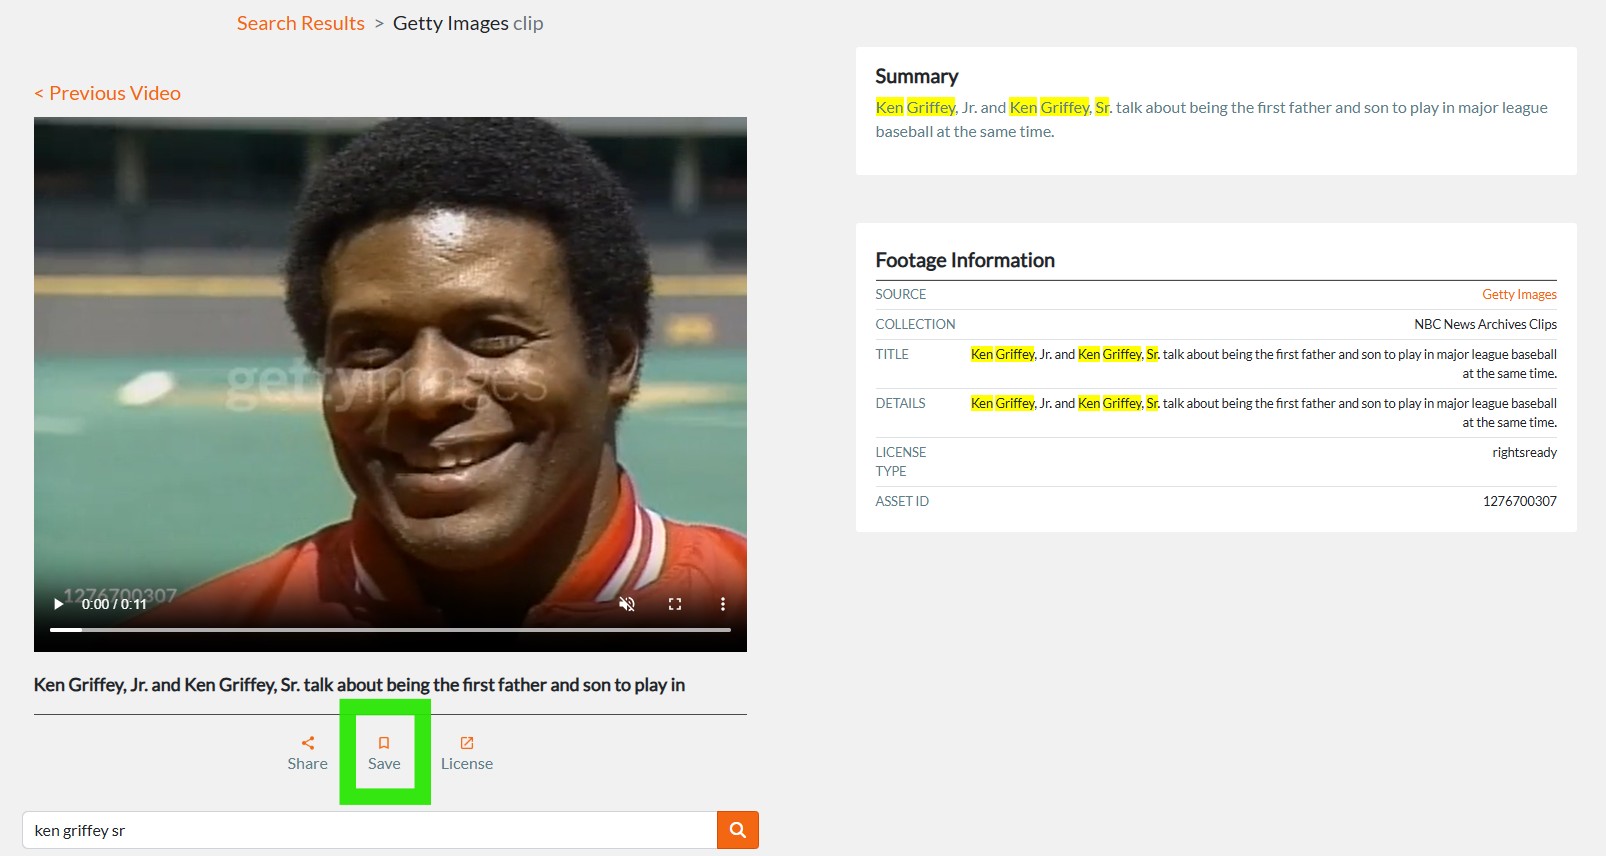
When you conduct a search and find a clip on Footage.net you can save a clip for future use. To save a clip, you must must be a registered user (sign-up for a free account).
Once you are logged in simply click on the “Save Clip” feature and Footage.net will save the clip to your account.
2. Create Custom Project Folders and Organize Your Saved Clips
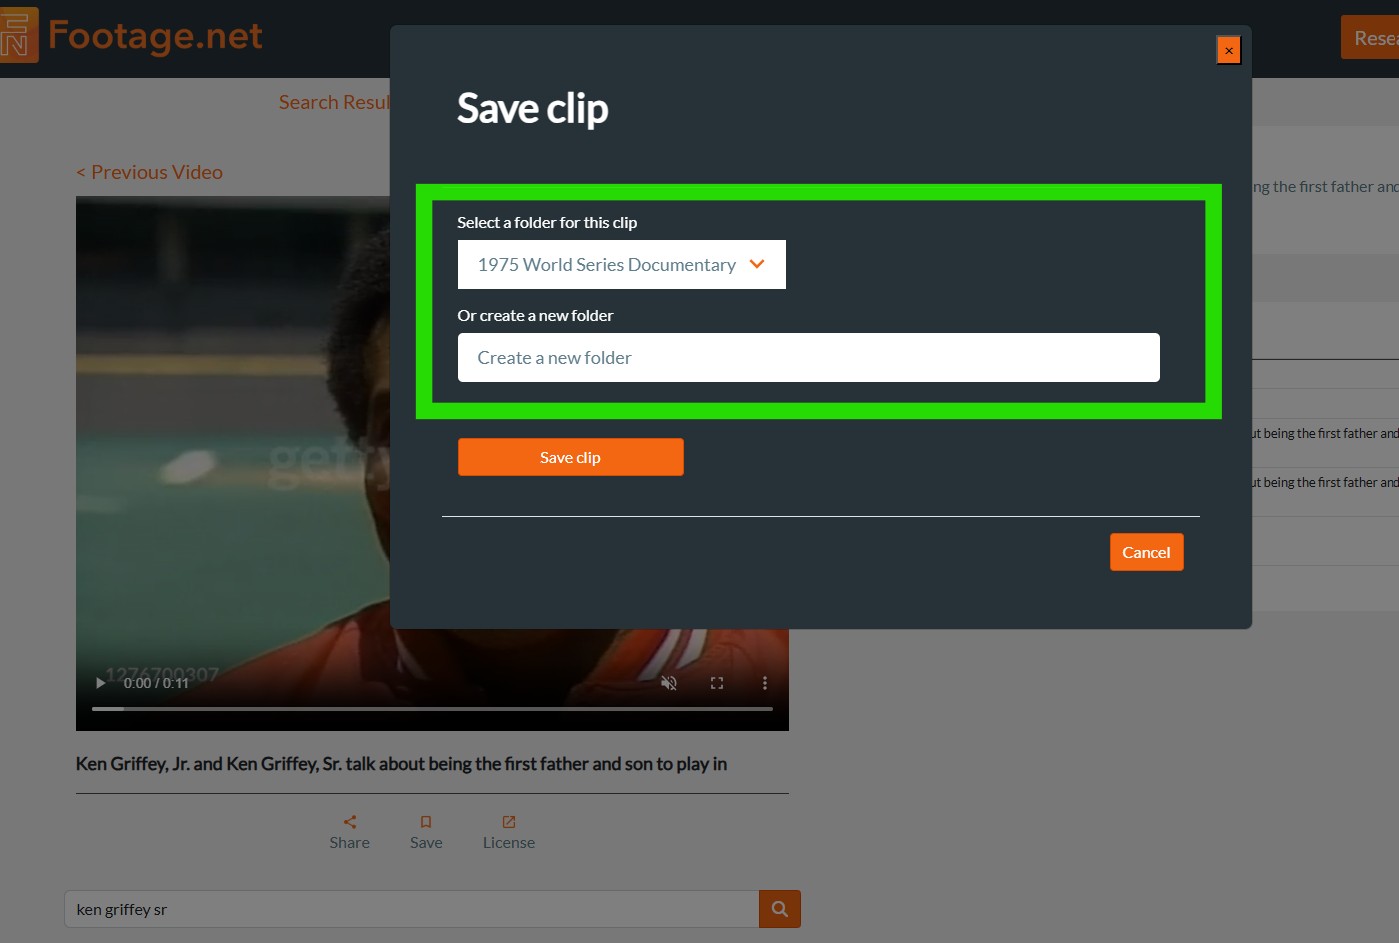
After you click “Save” you will be prompted to save the clip in your default clip bin or you can create a new folder. Creating custom project folders is a free and easy way to organize your clips by project type. You can name your folder however you would like.
Once you’ve named your project, click on “Save clip” and your clip will be saved to your project folder.
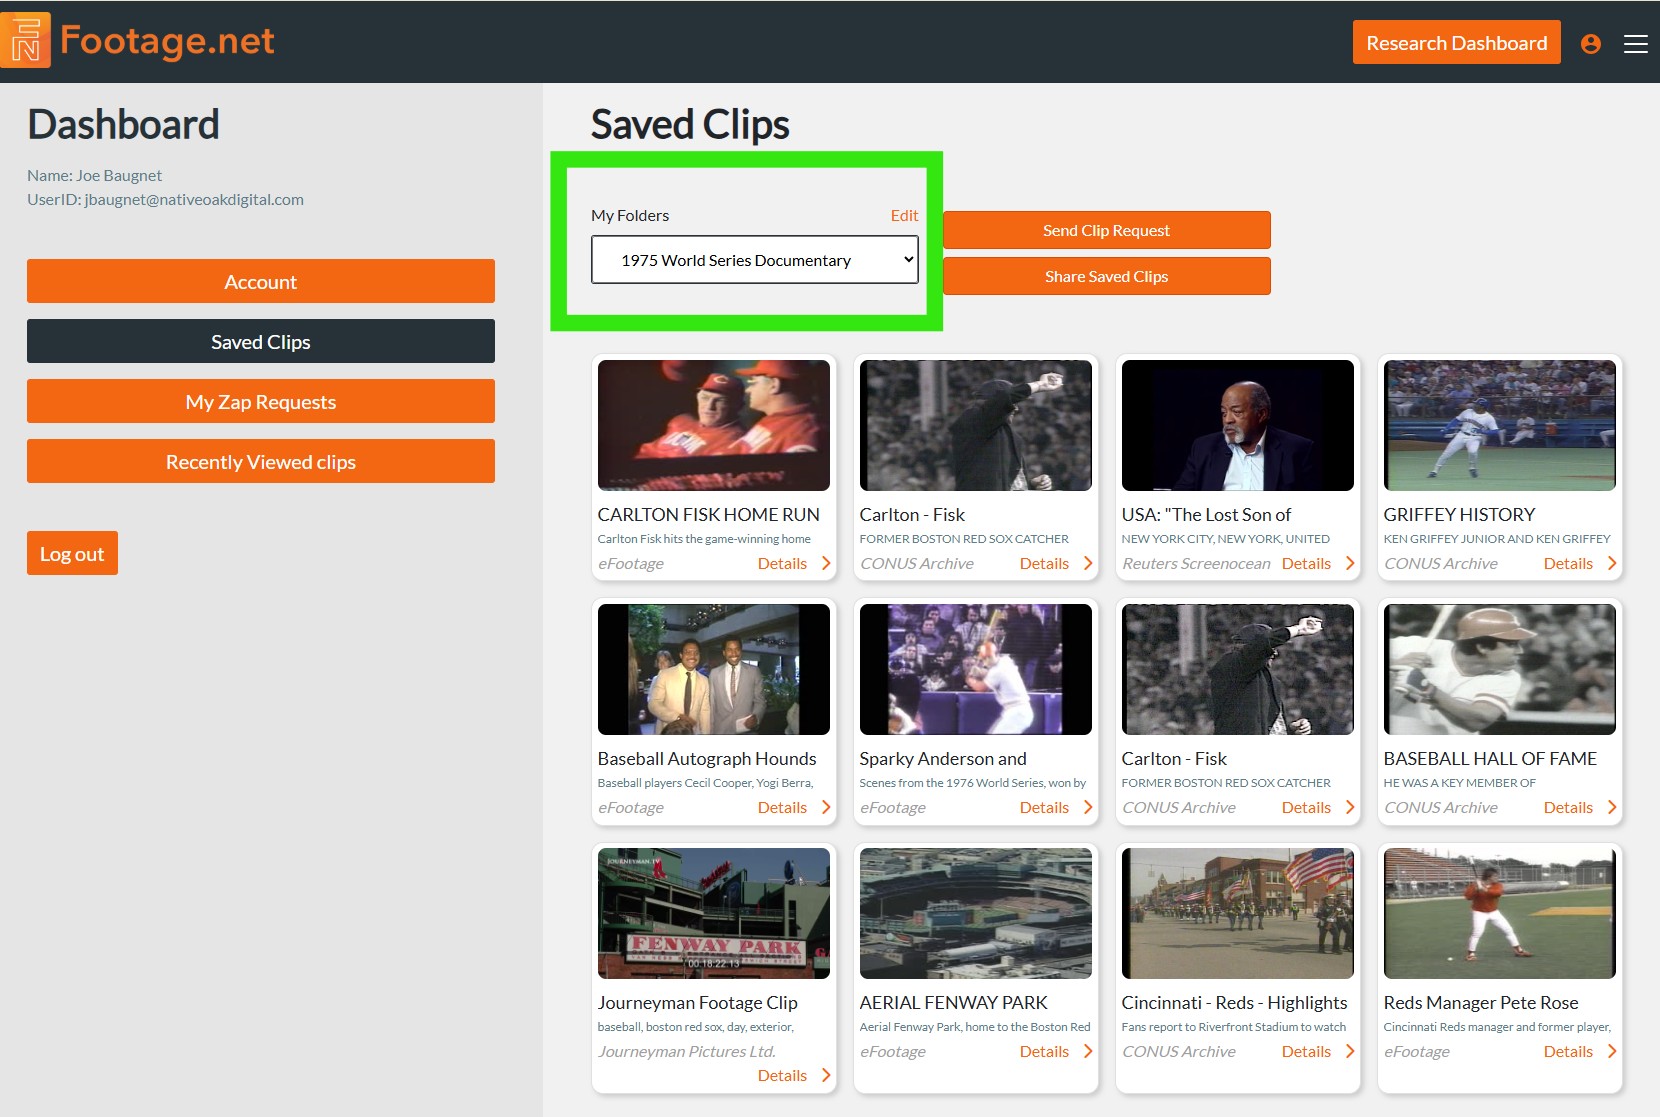
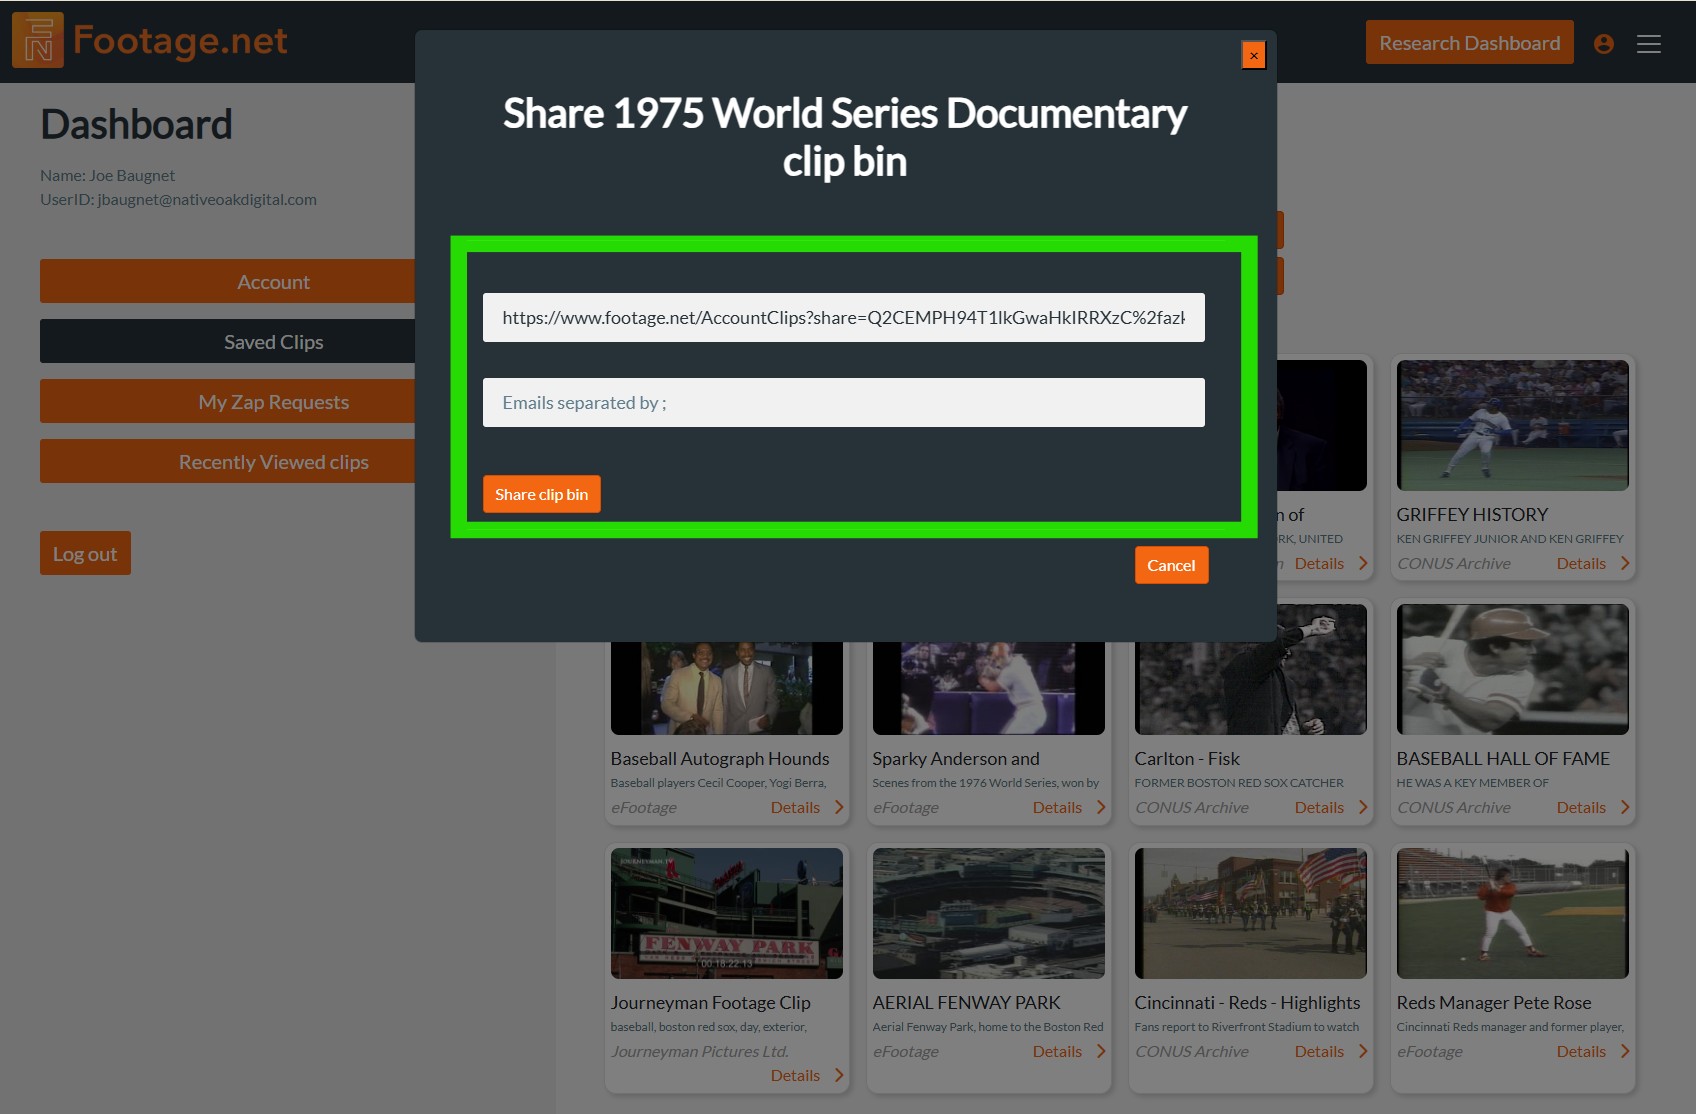
Once you have saved your clip to your project visit the Research Dashboard and click on “Saved Clips” to access your project. The example below shows a saved folder for the 1975 World Series, dubbed one of the best World Series matchups ever to be played.
With the saved folder you can choose to share the clips with other colleagues or “Send a Clip Request” to license the footage from the specific partners.
Once you’ve named your project, click on “Save clip” and your clip will be saved to your project folder.
3. Share Your Project with Other Team Members
Sharing your project with other team members is incredibly simple. When you are in your saved clip bin, click on “Share Saved Clips” which generates an easy-to-share URL that can be added to project management software like Monday or Jira, or shared directly.
Screenshot placeholder — replace in Elementor editor
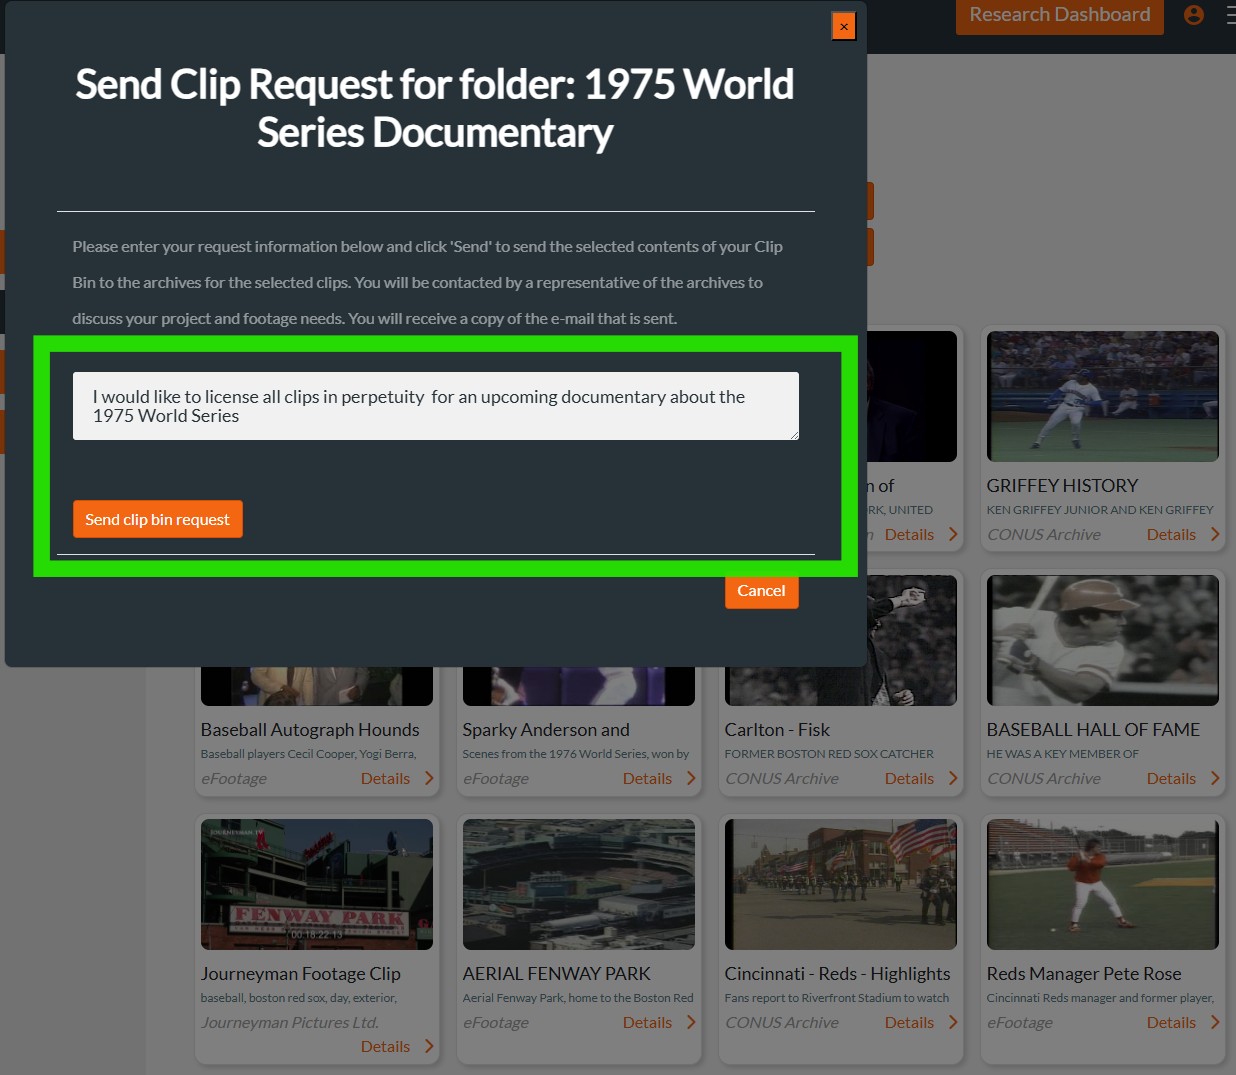
4. Request & License Clips from Archive Partners
Once you’ve aggregated all of the clips you need for your project, you can send a “Clip Bin Request”. The Clip Bin Request feature sends your selected clips to the corresponding archives for review. The archives will review your request and reach out to you with further licensing details.
Screenshot placeholder — replace in Elementor editor
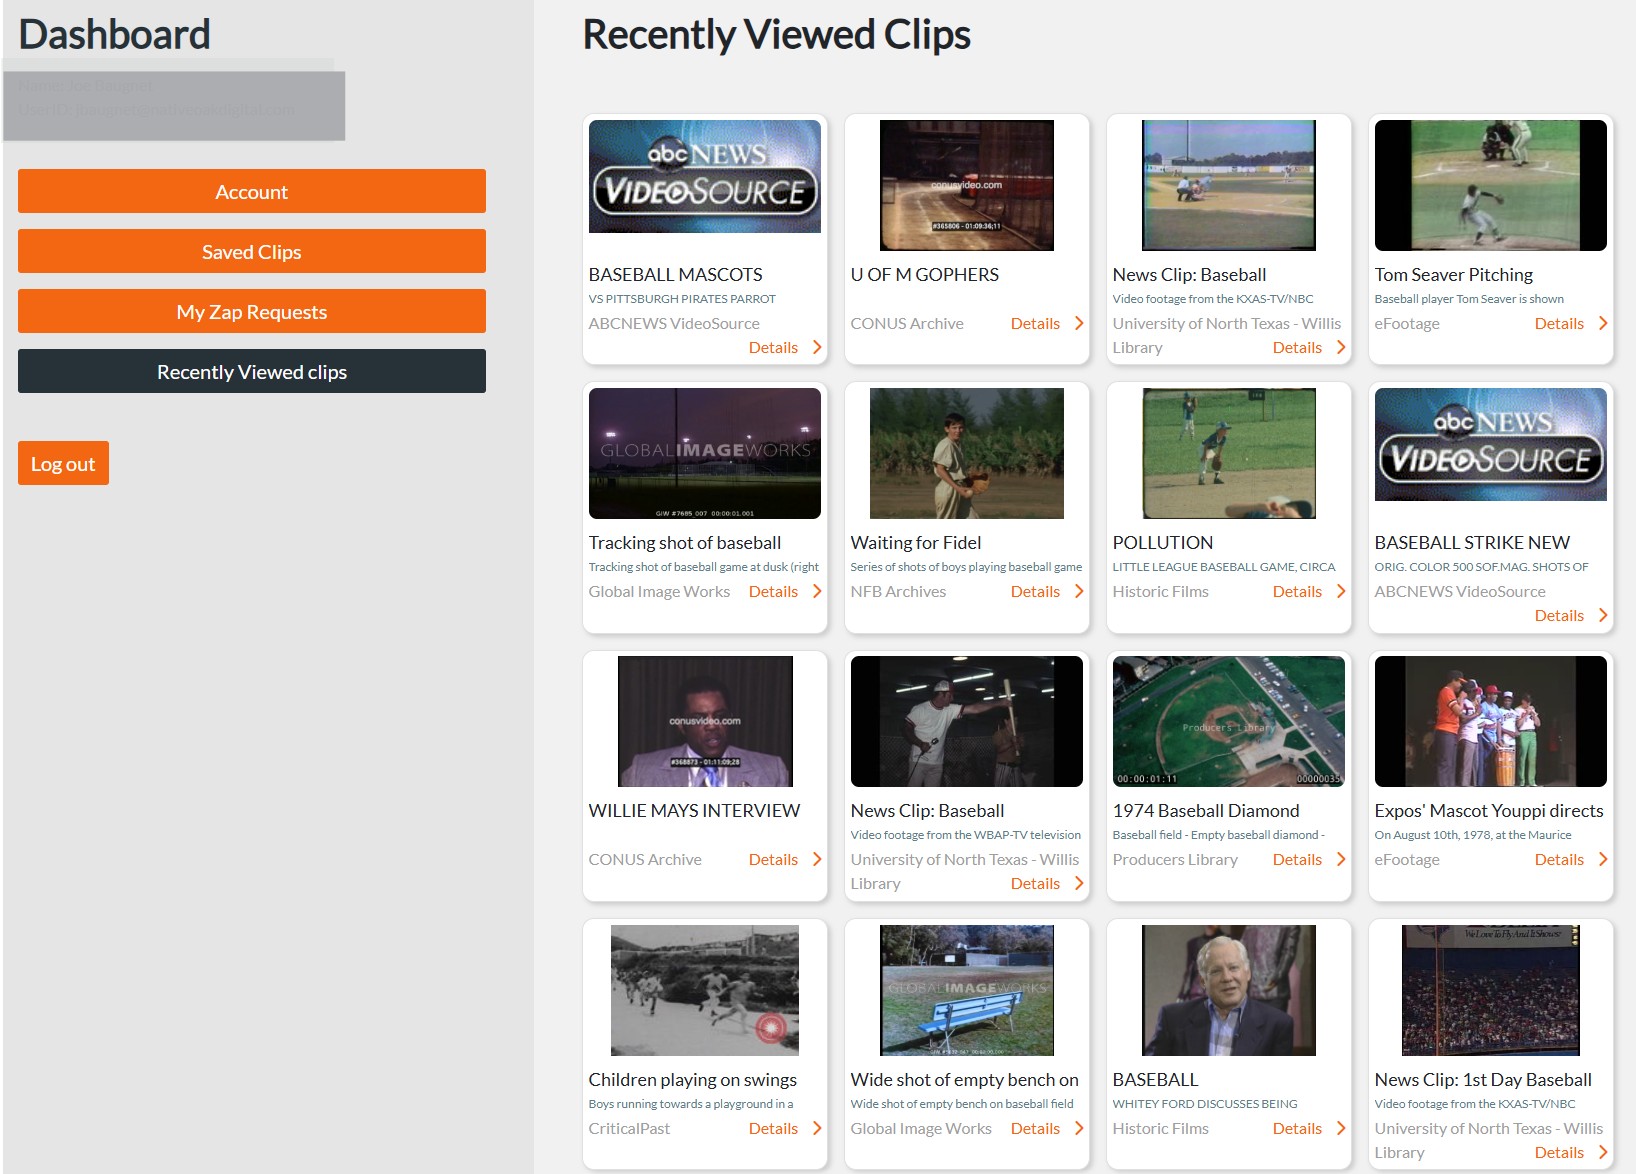
5. View Your Clip History via “Recently Viewed Clips” Feature
Forgot about a video you wanted to use and can’t find now? No problem.
Footage.net’s “Recently Viewed Clips” feature allows you to view every clip you’ve interacted with while you’re logged into your account. Simply click on “Recently Viewed Clips” in your dashboard to find clips that you may want to go back and revisit.
Screenshot placeholder — replace in Elementor editor
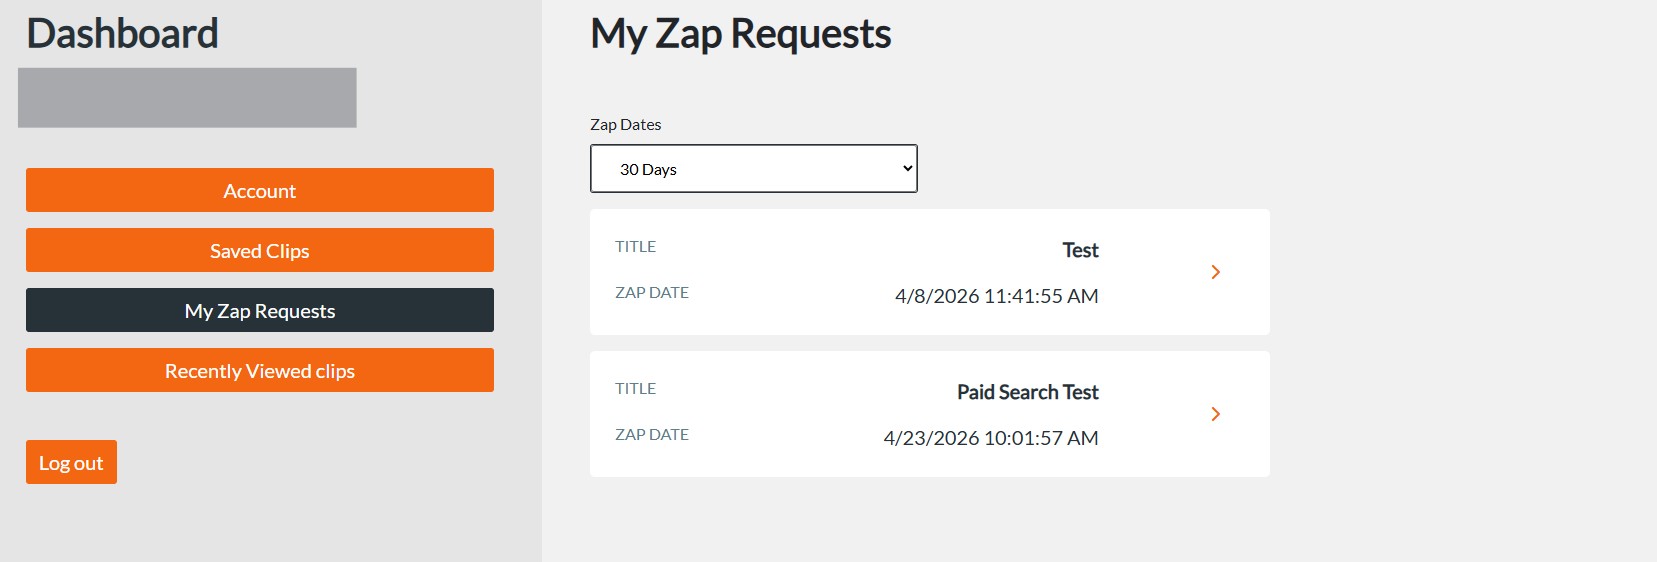
6. View Zap Request History
Another helpful feature in your account dashboard is the ability to look back on the the ZAP Requests you sent going back as far as five years ago.
This tool can be incredibly helpful when trying to track down which projects you received coverage for and which projects still require a Zap Request.
Ready to send a Zap Request? Submit a Zap Request Here
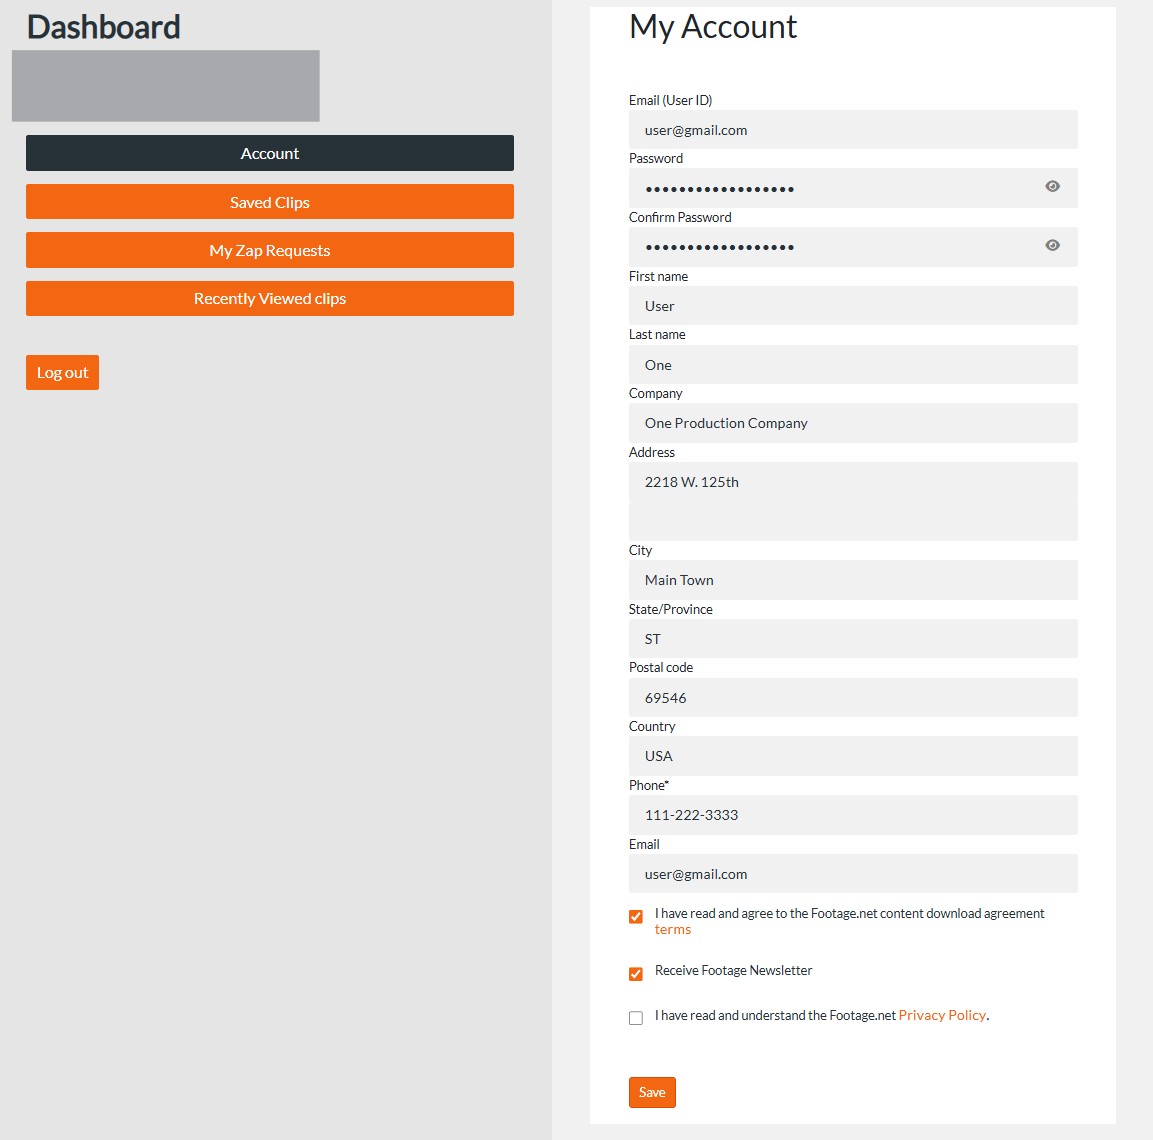
7. Updating Your Account Information
Have you recently changed jobs or took on a new project? You can fix your contact information in the Research Dashboard under the Account Tab.
First, locate the Account tab in the dashboard and click on it. Next, you’ll see various fields to update all of your contact information. Simply update the fields that are relevant and click “Save” at the bottom of the form.
Screenshot placeholder — replace in Elementor editor
7. Updating Your Account Information
Congratulations! You are now ready to use the Footage.net platform to its full potential. Start your first search and build your first project today.
If you have any questions or need support, feel free to reach out to our team at info@footage.net.